Gateleg Table Restoration
This table was brought to me in pieces. The owners told me that it had spent a winter on the side porch with snow drifting up against it.
What is the difference between a Gateleg Table and a Drop Leaf Table? A Gateleg table has two hinged swinging sections so each leaf is supported directly by a leg (or two). A Drop Leaf table does not have a leg, just a bracket to support each leaf. The Gateleg table design dates back to sixteenth century England. These owners had bought the table from an antique store, so the date of manufacture is unknown.
Not many woodshops would have taken on this project but I was curious to see what lay under all that cracked paint, and boy was I surprised! I felt a bit like an archaelogist digging up dinosaur bones and trying to figure out how it all went together.
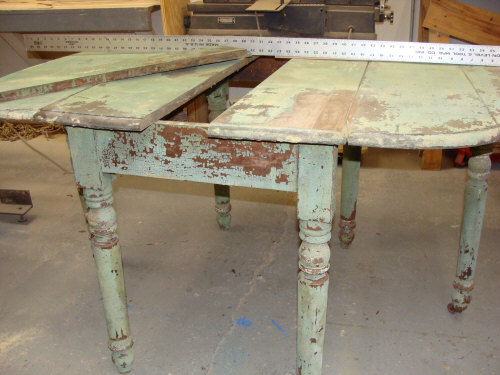
This table was in bad shape. It had rot, splits, chunks of wood missing and had been left out on a porch for at least one winter where snow could drift up against it. The hardware was curious too. The hinges had been replaced or moved several times but were now nearly frozen solid, I had to replace them.
The two wheels were even different heights, off by an inch.
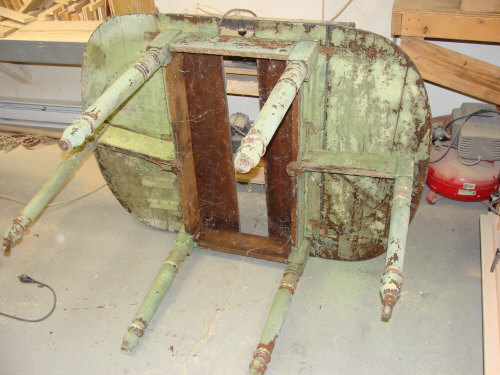
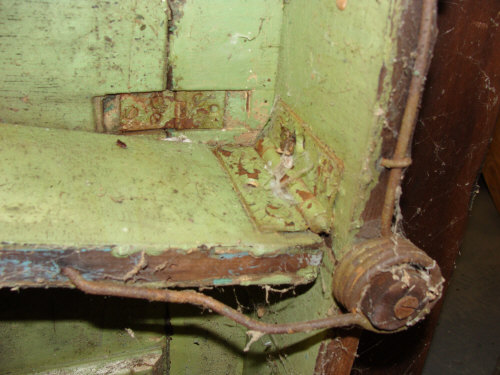
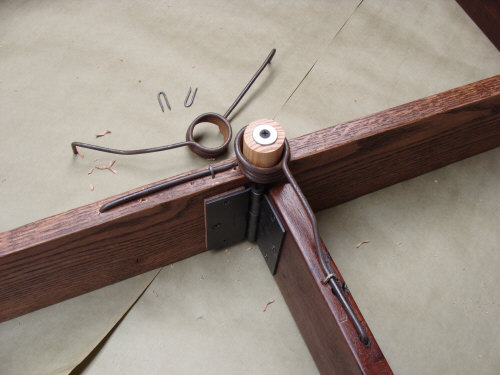
The swing hinges underneath were attached by inserting ends directly into the wood and they were held down with staples made from heavy guage bent wire. The neat thing about this design is all you have to do is lift the leaf and the gate swings open automatically to support it. Lowering the leaf has to be done manually.
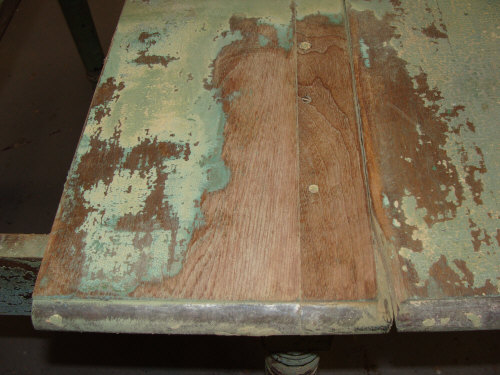
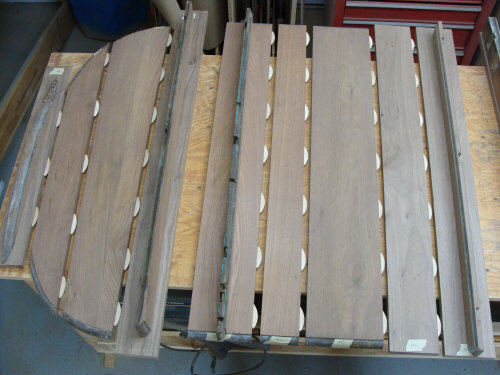
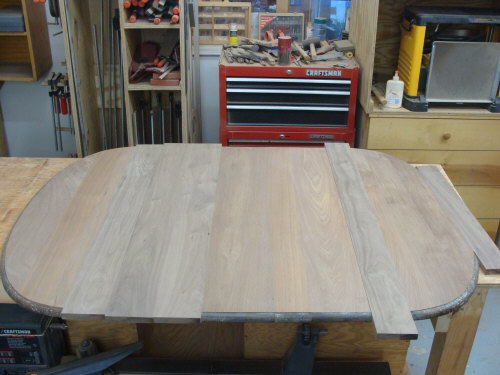
Once I took it mostly apart I ran the pieces through a planer. None of the seams were joined with bisquits or dowels, they were simply edge-glued. Not wanting to get less than 3/4" thickness, I finished sanding the valleys by hand. The wood was surprisingly straight, even after all it had been through. As I progressed through the layers of paint and stain I discovered that it had been repaired, broken, repaired again, and broken again. To cover up all the repairs and cracks they finally painted it.
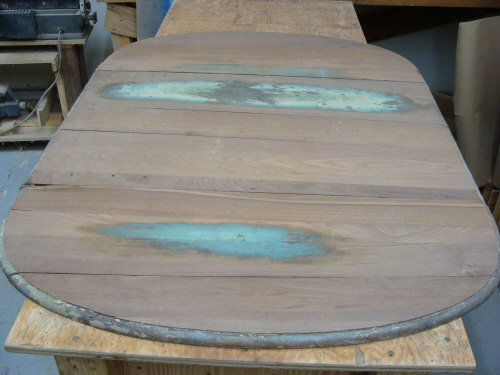
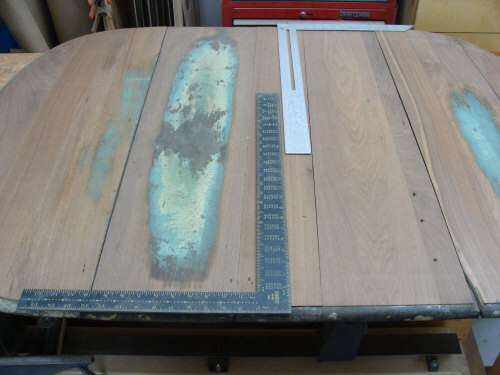
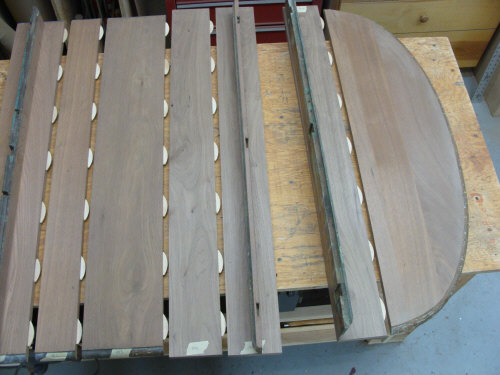
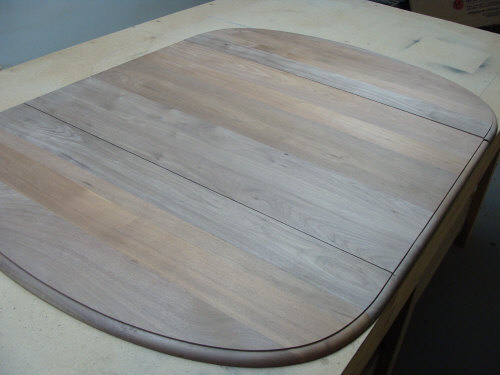
Now I could tell that the top and the two short ends were walnut. The long ends were oak because they were never visible under the leaves. The legs are probably maple and were custom turned by the original craftsman. I could tell they were not factory made because the coves and beads were at different places on each piece. The top was a story unto itself. I laid squares out twice to be sure of what I was seeing. None of the seams were straight across the table. In fact, none of the walnut strips were even square! One piece was 3" on one side and 4.5" on the other. Viewed from one side of the table, the middle seams leaned left as you can see in the picture with the two squares. The leaves both leaned to the right.
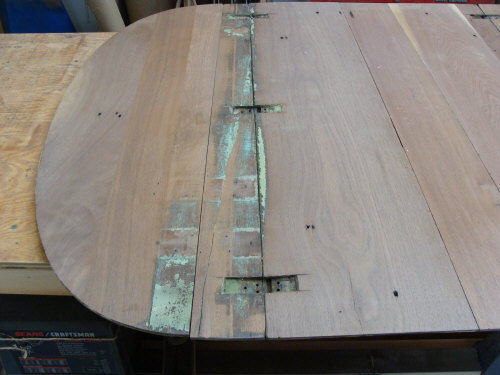
I found out why everything kept breaking in four places (where the hinges connected the leaves). When the leaf is dropped, the swinging leg is pushed inwards and is supposed to mate inside of the long piece. When it wouldn't always fit in, the weight of the leaf would split the leaf side, the middle piece edge, or both. This happened on both leaves multiple times. At least one new splice had been put in (the wood was darker than the rest) but even that had been split again. When I cut out the damaged parts and added new wood in these four places I made the middle section an inch wider which gave 1/2" more clearance on each side. Now even if the gate doesn't mesh at all there is no more splitting danger.
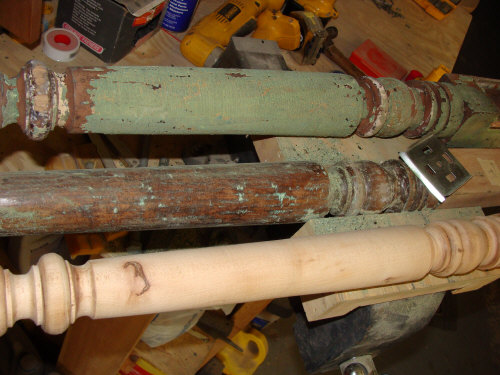
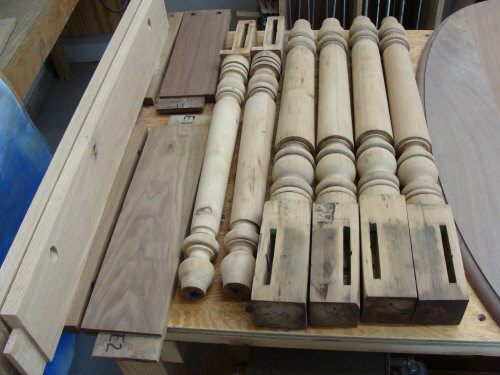
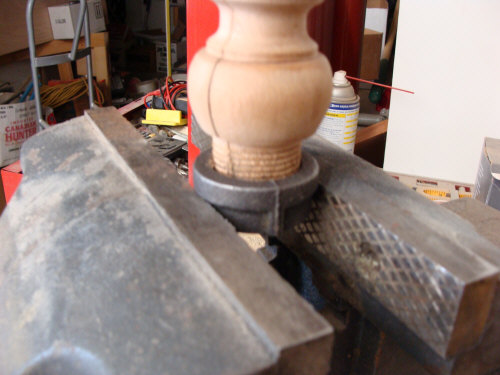
When I started turning the legs I discovered quickly that the paint (lead based) was so hard that it dulled the chisel on contact. I had to manually scrape off all the paint first. Since the legs had all bowed a bit since they were first made, I had to recenter each piece two or three times depending on which section I was working on.
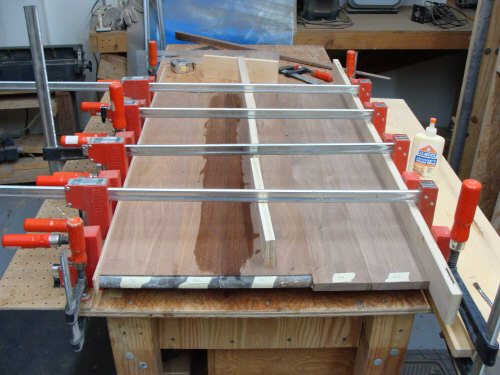
Here are the new pieces of wood about to be bisquited together. Note how I have corrected the leaning seams on the left and middle pieces.
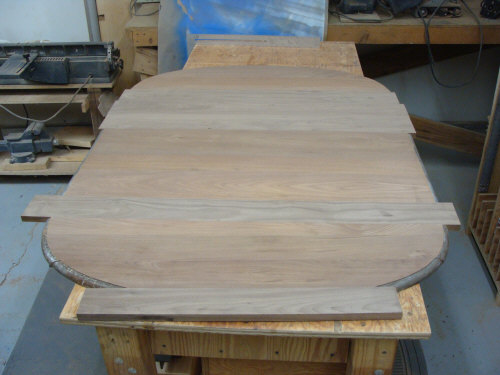
I left the right leaf with a bit of lean in it. This is a restoration not a replacement and I wanted to leave some of the original character.
Glueing and clamping one section at a time.
Glueing complete with the new pieces visible as straight ends.
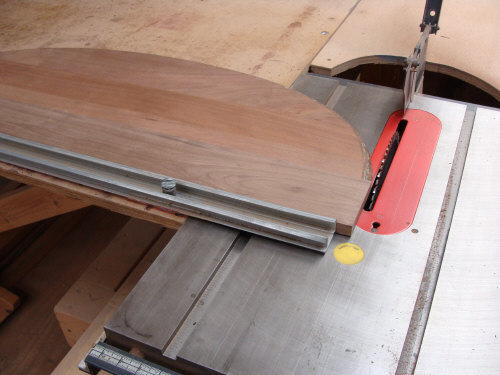
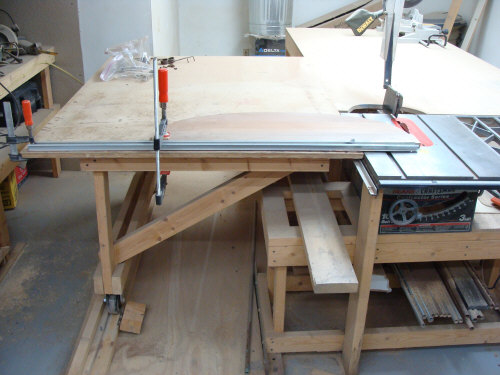
Squaring up the new ends with my custom sliding table saw.
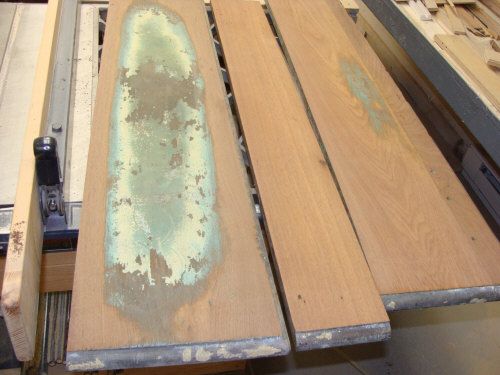
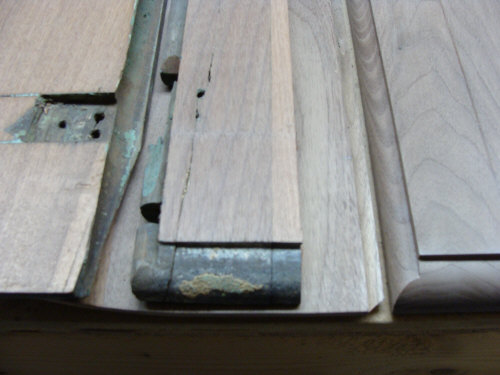
On the left are two original mating pieces, the new ones are on the right.
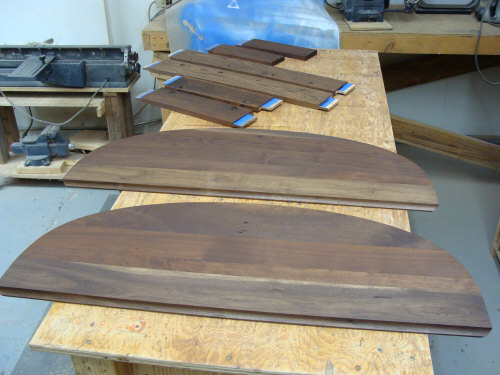
All routing work finished. I had to order a rare sized bit for the outer edge. The original top pieces of walnut ranged in color from reds to brown to a dark brown strip. I am glad they did this because I am a fan of showing off colors, I hate a piece that is perfect and straight grained.
Everything was now sanded. I had to replace both oak long pieces, the years destroyed the old ones.
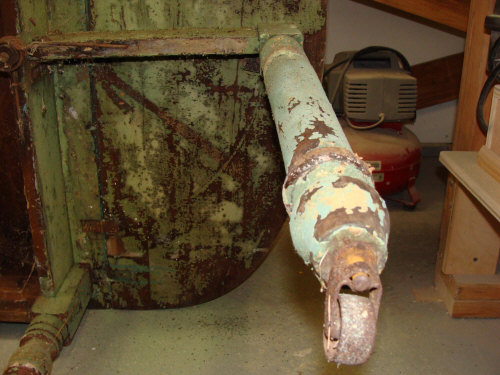
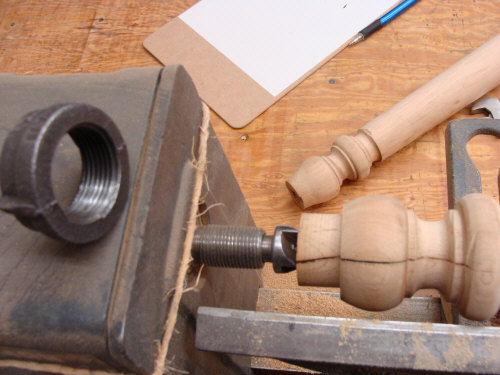
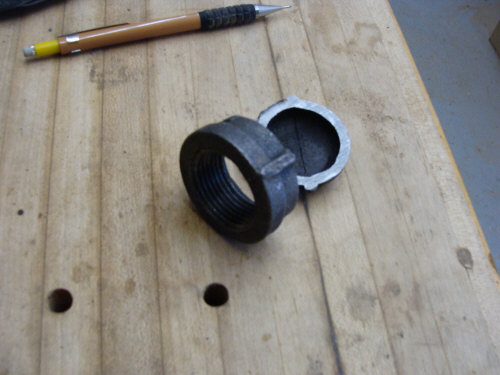
One of the gate legs had split nearly five inches because of a wobbly caster. The only way to save it was to lathe a flat in it and make a custom collar.
I cut the end off of a pipe cap and threaded it on. The bottom had to be cut off and left open for a new caster to fit in.
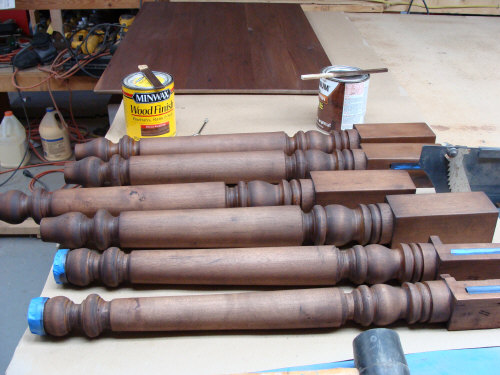
Finally it was time to stain. I spent some time experimenting with various colors and stain types to try and match up the walnut, maple and new oak. I settled on two types. The legs are in the foreground and the underside of the middle section is in the background.
The bottoms of the other pieces. Note how I taped off the tendons and mortices so the glue would work when I assembled them.
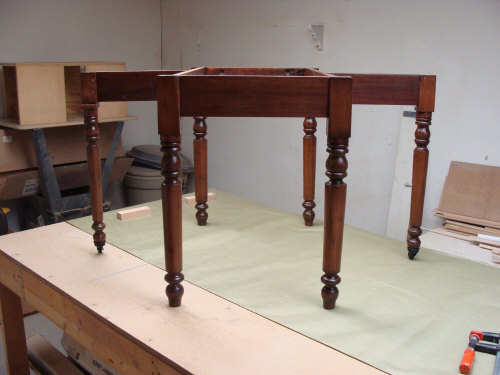
The base and all six legs assembled.
A closeup of the spring attached to one gateleg.
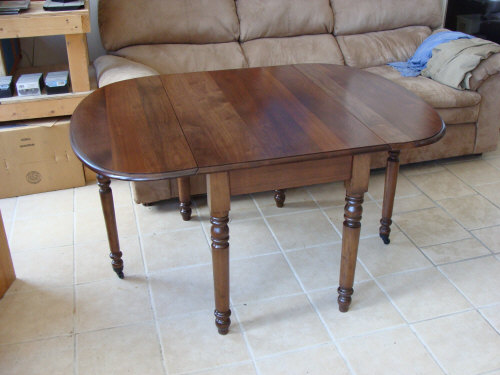
The finished table with the leaves folded.
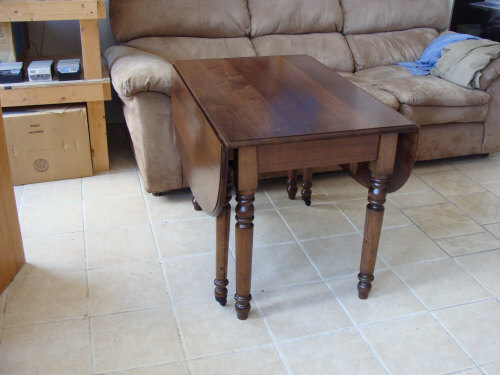
The finished table with the leaves open.